
Got questions? visit the
Toolbotics Community Forum
Tooli help - setting up the dispenser tool-head
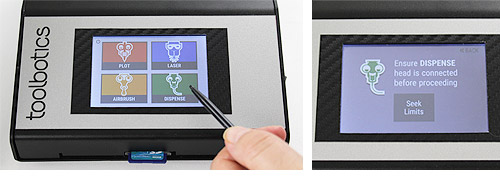
Tap DISPENSE in Toolbox screen, you will be prompted to install the dispense tool-head.
Note: The dispenser tool uses the plotter tool-head as its base for mounting.
Slide tool-head into dovetail slide. At this point, leave the tool sitting quite high and tighten the thumbscrews gently to hold the tool-head in place.
Attach the cable by inserting the plug into the socket on top of the tool-head and screw down the lock-nut (do not over-tighten).

With the tool-head attached you can now tap Seek Limits - Tooli will move the head-carriage to back-right corner (slowly) until the limit switches are triggered. The head carriage will remain in this position at the end of the procedure.
When loading the tube into the tool-head you may like to move the head-carriage so you can easily reach the tool-head.

To do this tap MOVE in the Move tool-head screen tap PRESENT TOOL.
The tool-head will move to the preset present tool position.
To load a dispensing tube into the tool-head you will need:
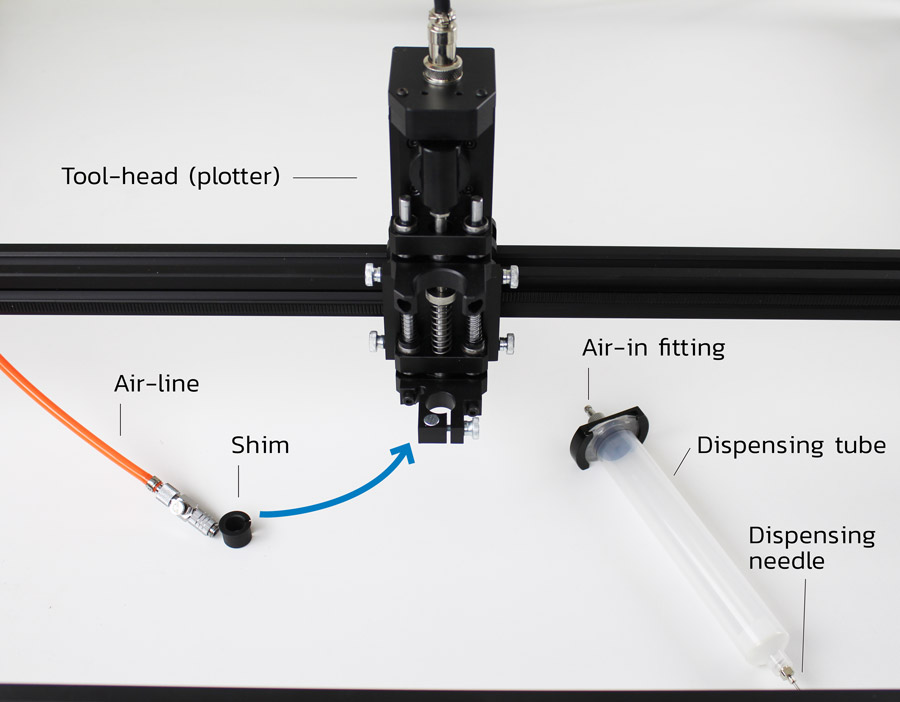
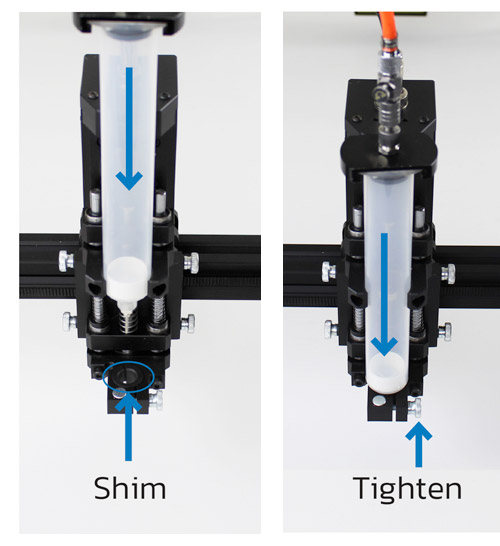
Insert appropriate sized shim to hold the dispensing tube, slide in dispensing tube from above - down through the shim then tighten thumb screw.
Attach the air line to the fitting at the top of the dispensing tube.
Next, you will need to set the height of the dispense tool-head, tap SETUP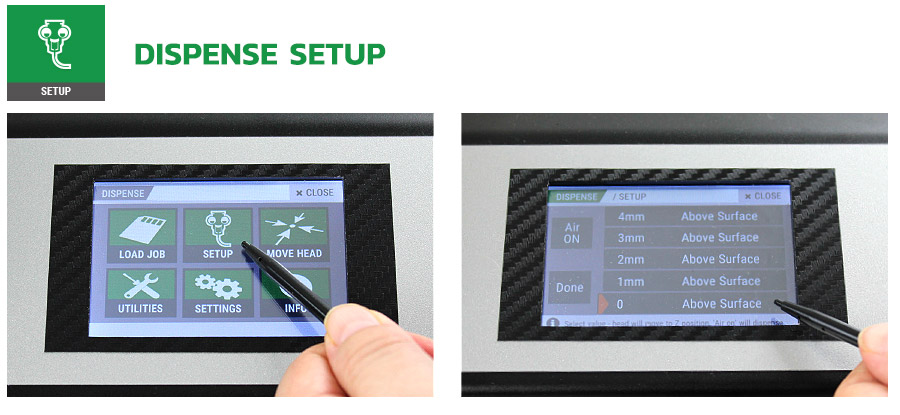
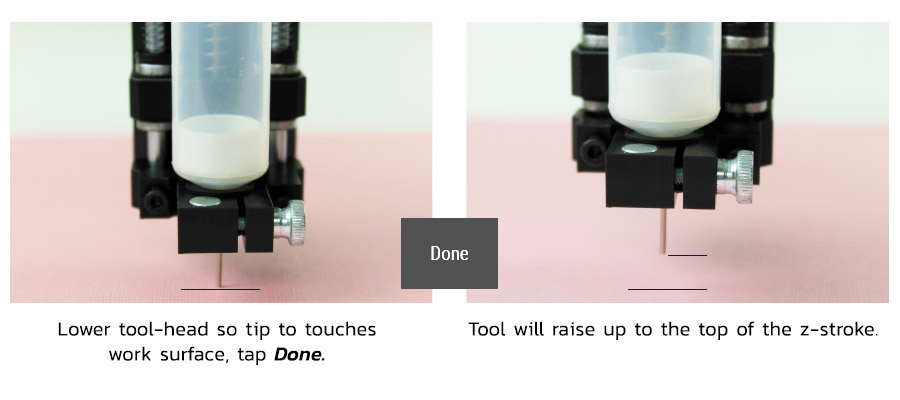
Tap 0 mm above surface the dispenser tool will move down - to the bottom of the z-axis stroke.
Loosen the thumbscrews and slide the tool-head down so the tip of the dispenser nozzle just touches the surface of the material you wish to dispense onto.
Tap Done - the dispenser tool will raise to the top of the z-axis stroke.
Once you have set the height of the dispenser to suit your material (work surface)you may wish to test the height and the air pressure to see the resulting bead thickness before running your job.
You can do this from the SETUP screen. Slide material under the dispenser tool head.
With the dispenser loaded with your medium (eg paint) - choose the height (mm Above Surface) that you wish to test dispense at. Tap Air ON dispenser will dispense.
You may wish to move the material around under the dispenser head to see how the resulting bead looks. Tap Air OFF to stop dispensing. If you wish to try a different height setting select a new height from the options of ‘mm above surface’ and repeat until you determine which gives the best result. You can use this value as the surface offset when creating you G-Code in Art2Gcode.
This is also an opportune time to test the air pressure coming from the compressor. Increasing pressure will increase bead-flow - adjust at compressor until desired flow-rate is achieved.
Watch our video on how to set up the dispenser tool-head for more details.